# yum install glusterfs glusterfs-fuse
Accessing Data - Setting Up Clients
GlusterFS volumes can be accessed using a number of technologies:
-
Native Client (see Native Client)
-
Network File System (NFS) v3 (see NFS)
-
Server Message Block (SMB) (see SMB)
Cross Protocol Data Access.
Although a GlusterFS trusted pool can be configured to support multiple protocols simultaneously, a single volume cannot be freely accessed by different protocols due to differences in locking semantics. The table below defines which protocols can safely access the same volume concurrently.
| SMB | NFS | Native Client | Object | |
|---|---|---|---|---|
|
Yes |
No |
No |
No |
|
No |
Yes |
Yes |
Yes |
|
No |
Yes |
Yes |
Yes |
|
No |
Yes |
Yes |
Yes |
Access Protocols Supportability.
The following table provides the support matrix for the supported access protocols with TCP/RDMA.
| Access Protocols | TCP | RDMA |
|---|---|---|
FUSE |
Yes |
Yes |
SMB |
Yes |
No |
NFS |
Yes |
Yes |
Important
GlusterFS requires certain ports to be open. You must ensure that the firewall settings allow access to the ports listed at Port Information.
Native Client
Native Client is a FUSE-based client running in user space. Native Client is the recommended method for accessing GlusterFS volumes when high concurrency and high write performance is required.
This section introduces Native Client and explains how to install the software on client machines. This section also describes how to mount GlusterFS volumes on clients (both manually and automatically) and how to verify that the GlusterFS volume has mounted successfully.
| Red Hat Enterprise Linux version | GlusterFS version | Native client version |
|---|---|---|
6.5 |
3.0 |
3.0, 2.1* |
6.6 |
3.0.2, 3.0.3, 3.0.4 |
3.0, 2.1* |
6.7 |
3.1, 3.1.1, 3.1.2 |
3.1, 3.0, 2.1* |
6.8 |
3.1.3 |
3.1.3 |
7.1 |
3.1, 3.1.1 |
3.1, 3.0, 2.1* |
7.2 |
3.1.2 |
3.1, 3.0, 2.1* |
7.2 |
3.1.3 |
3.1.3 |
Installing Native Client
Run the yum install command to install the native client RPM packages.
Upgrading Native Client
Unmount any gluster volumes prior to upgrading the native client.
# umount /mnt/glusterfs
Run the yum update command to upgrade the native client:
# yum update glusterfs glusterfs-fuse
Remount volumes as discussed in Mounting GlusterFS Volumes.
Mounting GlusterFS Volumes
After installing Native Client, the GlusterFS volumes must be mounted to access data. Two methods are available:
After mounting a volume, test the mounted volume using the procedure described in Testing Mounted Volumes.
Mount Commands and Options
The following options are available when using the mount -t glusterfs
command. All options must be separated with commas.
# mount -t glusterfs -o backup-volfile-servers=volfile_server2:volfile_server3:.... ..:volfile_serverN,transport-type tcp,log-level=WARNING,log-file=/var/log/gluster.log server1:/test-volume /mnt/glusterfs
- backup-volfile-servers=<volfile_server2>:<volfile_server3>:…:<volfile_serverN>
-
List of the backup volfile servers to mount the client. If this option is specified while mounting the fuse client, when the first volfile server fails, the servers specified in
backup-volfile-serversoption are used as volfile servers to mount the client until the mount is successful. + _ NoteThis option was earlier specified as `backupvolfile-server` which is no longer valid. _____________________________________________________________________________________
- log-level
-
Logs only specified level or higher severity messages in the log-file.
- log-file
-
Logs the messages in the specified file.
- transport-type
-
Specifies the transport type that FUSE client must use to communicate with bricks. If the volume was created with only one transport type, then that becomes the default when no value is specified. In case of
tcp,rdmavolume, tcp is the default. - ro
-
Mounts the file system as read only.
- acl
-
Enables POSIX Access Control List on mount.
- background-qlen=n
-
Enables FUSE to handle n number of requests to be queued before subsequent requests are denied. Default value of n is 64.
- enable-ino32
-
this option enables file system to present 32-bit inodes instead of 64- bit inodes.
Mounting Volumes Manually
Create a mount point and run the
mount -t glusterfs HOSTNAME|IPADDRESS:/VOLNAME /MOUNTDIR command to
manually mount a GlusterFS volume.
Note
The server specified in the mount command is used to fetch the glusterFS configuration volfile, which describes the volume name. The client then communicates directly with the servers mentioned in the volfile (which may not actually include the server used for mount).
If a mount point has not yet been created for the volume, run the
mkdir command to create a mount point.
# mkdir /mnt/glusterfs
Run the mount -t glusterfs command, using the key in the task summary
as a guide.
# mount -t glusterfs server1:/test-volume /mnt/glusterfs
Mounting Volumes Automatically
Volumes can be mounted automatically each time the systems starts.
The server specified in the mount command is used to fetch the glusterFS configuration volfile, which describes the volume name. The client then communicates directly with the servers mentioned in the volfile (which may not actually include the server used for mount).
Mounting a Volume Automatically
Mount a GlusterFS Volume automatically at server start.
-
Open the
/etc/fstabfile in a text editor. -
Append the following configuration to the
fstabfile.HOSTNAME|IPADDRESS:/VOLNAME /MOUNTDIR glusterfs defaults,_netdev 0 0
Using the example server names, the entry contains the following replaced values.
server1:/test-volume /mnt/glusterfs glusterfs defaults,_netdev 0 0
If you want to specify the transport type then check the following example:
server1:/test-volume /mnt/glusterfs glusterfs defaults,_netdev,transport=tcp 0 0
Testing Mounted Volumes
Using the command-line, verify the GlusterFS volumes have been successfully mounted. All three commands can be run in the order listed, or used independently to verify a volume has been successfully mounted.
Run the mount command to check whether the volume was successfully
mounted.
# mount
server1:/test-volume on /mnt/glusterfs type fuse.glusterfs(rw,allow_other,default_permissions,max_read=131072
If transport option is used while mounting a volume, mount status will have the transport type appended to the volume name. For example, for transport=tcp:
# mount
server1:/test-volume.tcp on /mnt/glusterfs type fuse.glusterfs(rw,allow_other,default_permissions,max_read=131072
Run the df command to display the aggregated storage space from all
the bricks in a volume.
# df -h /mnt/glusterfs
Filesystem           Size  Used  Avail  Use%  Mounted on
server1:/test-volume  28T  22T   5.4T   82%   /mnt/glusterfs
Move to the mount directory using the cd command, and list the
contents.
# cd /mnt/glusterfs
# ls
NFS
Linux, and other operating systems that support the NFSv3 standard can use NFS to access the GlusterFS volumes.
NFS ACL v3 is supported, which allows getfacl and setfacl `operations
on NFS clients. The following options are provided to configure the
Access Control Lists (ACL) in the glusterFS NFS server with the
`nfs.acl option. For example:
-
To set nfs.acl
ON, run the following command:# gluster volume set VOLNAME nfs.acl on -
To set nfs.acl
OFF, run the following command:# gluster volume set VOLNAME nfs.acl off
Note
ACL is
ONby default.
GlusterFS includes Network Lock Manager (NLM) v4. NLM protocol allows NFSv3 clients to lock files across the network. NLM is required to make applications running on top of NFSv3 mount points to use the standard fcntl() (POSIX) and flock() (BSD) lock system calls to synchronize access across clients.
This section describes how to use NFS to mount GlusterFS volumes (both manually and automatically) and how to verify that the volume has been mounted successfully.
Important
On Red Hat Enterprise Linux 7, enable the firewall service in the active zones for runtime and permanent mode using the following commands:
To get a list of active zones, run the following command:
# firewall-cmd --get-active-zonesTo allow the firewall service in the active zones, run the following commands:
# firewall-cmd --zone=zone_name --add-service=nfs --add-service=rpc-bind
# firewall-cmd --zone=zone_name --add-service=nfs --add-service=rpc-bind --permanent
Setting up CTDB for NFS
In a replicated volume environment, the CTDB software (Cluster Trivial Database) has to be configured to provide high availability and lock synchronization for Samba shares. CTDB provides high availability by adding virtual IP addresses (VIPs) and a heartbeat service.
When a node in the trusted storage pool fails, CTDB enables a different node to take over the virtual IP addresses that the failed node was hosting. This ensures the IP addresses for the services provided are always available.
Important
On Red Hat Enterprise Linux 7, enable the CTDB firewall service in the active zones for runtime and permanent mode using the below commands:
To get a list of active zones, run the following command:
# firewall-cmd --get-active-zonesTo add ports to the active zones, run the following commands:
# firewall-cmd --zone=zone_name --add-port=4379/tcp
# firewall-cmd --zone=zone_name --add-port=4379/tcp  --permanent
Note
Amazon Elastic Compute Cloud (EC2) does not support VIPs and is hence not compatible with this solution.
Prerequisites
Follow these steps before configuring CTDB on a GlusterFS Server:
-
If you already have an older version of CTDB (version ⇐ ctdb1.x), then remove CTDB by executing the following command:
# yum remove ctdb
After removing the older version, proceed with installing the latest CTDB.
Note
Ensure that the system is subscribed to the samba channel to get the latest CTDB packages.
-
Install CTDB on all the nodes that are used as NFS servers to the latest version using the following command:
# yum install ctdb
-
In a CTDB based high availability environment of Samba/NFS , the locks will not be migrated on failover.
-
You must ensure to open TCP port 4379 between the GlusterFS servers: This is the internode communication port of CTDB.
Configuring CTDB on GlusterFS Server
To configure CTDB on GlusterFS server, execute the following steps:
-
Create a replicate volume. This volume will host only a zero byte lock file, hence choose minimal sized bricks. To create a replicate volume run the following command:
# gluster volume create volname replica n ipaddress:/brick path.......N times
where,
N: The number of nodes that are used as NFS servers. Each node must host one brick.
For example:
# gluster volume create ctdb replica 4 10.16.157.75:/rhgs/brick1/ctdb/b1 10.16.157.78:/rhgs/brick1/ctdb/b2 10.16.157.81:/rhgs/brick1/ctdb/b3 10.16.157.84:/rhgs/brick1/ctdb/b4
-
In the following files, replace "all" in the statement META="all" to the newly created volume name
/var/lib/glusterd/hooks/1/start/post/S29CTDBsetup.sh
/var/lib/glusterd/hooks/1/stop/pre/S29CTDB-teardown.sh
For example:
META="all"
  to
META="ctdb"
-
Start the volume.
The S29CTDBsetup.sh script runs on all GlusterFS servers, adds an entry in /etc/fstab/ for the mount, and mounts the volume at /gluster/lock on all the nodes with NFS server. It also enables automatic start of CTDB service on reboot.
Note
When you stop the special CTDB volume, the S29CTDB-teardown.sh script runs on all GlusterFS servers and removes an entry in /etc/fstab/ for the mount and unmounts the volume at /gluster/lock.
-
Verify if the file /etc/sysconfig/ctdb exists on all the nodes that is used as NFS server. This file contains GlusterFS recommended CTDB configurations.
-
Create /etc/ctdb/nodes file on all the nodes that is used as NFS servers and add the IPs of these nodes to the file.
10.16.157.0
10.16.157.3
10.16.157.6
10.16.157.9
The IPs listed here are the private IPs of NFS servers.
-
On all the nodes that are used as NFS server which require IP failover, create /etc/ctdb/public_addresses file and add the virtual IPs that CTDB should create to this file. Add these IP address in the following format:
<Virtual IP>/<routing prefix><node interface>
For example:
192.168.1.20/24 eth0
192.168.1.21/24 eth0
-
Start the CTDB service on all the nodes by executing the following command:
# service ctdb start
Using NFS to Mount GlusterFS Volumes
You can use either of the following methods to mount GlusterFS volumes:
Note
Currently GlusterFS NFS server only supports version 3 of NFS protocol. As a preferred option, always configure version 3 as the default version in the
nfsmount.conffile at/etc/nfsmount.confby adding the following text in the file:
Defaultvers=3In case the file is not modified, then ensure to add
vers=3manually in all the mount commands.
# mount nfsserver:export -o vers=3 /MOUNTPOINT
RDMA support in GlusterFS that is mentioned in the previous sections is with respect to communication between bricks and Fuse mount/GFAPI/NFS server. NFS kernel client will still communicate with GlusterFS NFS server over tcp.
In case of volumes which were created with only one type of transport,
communication between GlusterFS NFS server and bricks will be over that
transport type. In case of tcp,rdma volume it could be changed using
the volume set option nfs.transport-type.
After mounting a volume, you can test the mounted volume using the procedure described in Testing Volumes Mounted Using NFS.
Manually Mounting Volumes Using NFS
Create a mount point and run the mount command to manually mount a
GlusterFS volume using NFS.
-
If a mount point has not yet been created for the volume, run the
mkdircommand to create a mount point.# mkdir /mnt/glusterfs
-
Run the correct
mountcommand for the system.- For Linux
# mount -t nfs -o vers=3 server1:/test-volume /mnt/glusterfs
- For Solaris
# mount -o vers=3 nfs://server1:38467/test-volume /mnt/glusterfs
Manually Mount a GlusterFS Volume using NFS over TCP
Create a mount point and run the mount command to manually mount a
GlusterFS volume using NFS over TCP.
Note
glusterFS NFS server does not support UDP. If a NFS client such as Solaris client, connects by default using UDP, the following message appears:
requested NFS version or transport protocol is not supportedThe option
nfs.mount-udpis supported for mounting a volume, by default it is disabled. The following are the limitations:
If
nfs.mount-udpis enabled, the MOUNT protocol needed for NFSv3 can handle requests from NFS-clients that require MOUNT over UDP. This is useful for at least some versions of Solaris, IBM AIX and HP-UX.Currently, MOUNT over UDP does not have support for mounting subdirectories on a volume. Mounting
server:/volume/subdirexports is only functional when MOUNT over TCP is used.MOUNT over UDP does not currently have support for different authentication options that MOUNT over TCP honors. Enabling
nfs.mount-udpmay give more permissions to NFS clients than intended via various authentication options likenfs.rpc-auth-allow,nfs.rpc-auth-rejectandnfs.export-dir.
-
If a mount point has not yet been created for the volume, run the
mkdircommand to create a mount point.# mkdir /mnt/glusterfs
-
Run the correct
mountcommand for the system, specifying the TCP protocol option for the system.- For Linux
# mount -t nfs -o vers=3,mountproto=tcp server1:/test-volume /mnt/glusterfs
- For Solaris
# mount -o proto=tcp, nfs://server1:38467/test-volume /mnt/glusterfs
Automatically Mounting Volumes Using NFS
GlusterFS volumes can be mounted automatically using NFS, each time the system starts.
Note
In addition to the tasks described below, GlusterFS supports Linux, UNIX, and similar operating system’s standard method of auto-mounting NFS mounts.
Update the
/etc/auto.masterand` /etc/auto.misc` files, and restart theautofsservice. Whenever a user or process attempts to access the directory it will be mounted in the background on-demand.
Mounting a Volume Automatically using NFS
Mount a GlusterFS Volume automatically using NFS at server start.
-
Open the
/etc/fstabfile in a text editor. -
Append the following configuration to the
fstabfile.HOSTNAME|IPADDRESS:/VOLNAME /MOUNTDIR glusterfs mountdir nfs defaults,_netdev, 0 0
Using the example server names, the entry contains the following replaced values.
server1:/test-volume /mnt/glusterfs nfs defaults,_netdev, 0 0
Mounting a Volume Automatically using NFS over TCP
Mount a GlusterFS Volume automatically using NFS over TCP at server start.
-
Open the
/etc/fstabfile in a text editor. -
Append the following configuration to the
fstabfile.HOSTNAME|IPADDRESS:/VOLNAME /MOUNTDIR glusterfs nfs defaults,_netdev,mountproto=tcp 0 0
Using the example server names, the entry contains the following replaced values.
server1:/test-volume /mnt/glusterfs nfs defaults,_netdev,mountproto=tcp 0 0
Authentication Support for Subdirectory Mount
This update extends nfs.export-dir option to provide client
authentication during sub-directory mount. The nfs.export-dir and
nfs.export-dirs options provide granular control to restrict or allow
specific clients to mount a sub-directory. These clients can be
authenticated with either an IP, host name or a Classless Inter-Domain
Routing (CIDR) range.
-
nfs.export-dirs: By default, all NFS sub-volumes are exported as individual exports. This option allows you to manage this behavior. When this option is turned off, none of the sub-volumes are exported and hence the sub-directories cannot be mounted. This option is on by default.
To set this option to off, run the following command:
# gluster volume set VOLNAME nfs.export-dirs offTo set this option to on, run the following command:
# gluster volume set VOLNAME nfs.export-dirs on -
nfs.export-dir: This option allows you to export specified subdirectories on the volume. You can export a particular subdirectory, for example:
# gluster volume set VOLNAME nfs.export-dir /d1,/d2/d3/d4,/d6where d1, d2, d3, d4, d6 are the sub-directories.
You can also control the access to mount these subdirectories based on the IP address, host name or a CIDR. For example:
# gluster volume set VOLNAME nfs.export-dir "/d1(<ip address>),/d2/d3/d4(<host name>|<ip address>),/d6(<CIDR>)"The directory /d1, /d2 and /d6 are directories inside the volume. Volume name must not be added to the path. For example if the volume vol1 has directories d1 and d2, then to export these directories use the following command:
gluster volume set vol1 nfs.export-dir "/d1(192.0.2.2),d2(192.0.2.34)"
Testing Volumes Mounted Using NFS
You can confirm that GlusterFS directories are mounting successfully.
To test mounted volumes
Using the command-line, verify the GlusterFS volumes have been successfully mounted. All three commands can be run in the order listed, or used independently to verify a volume has been successfully mounted.
Run the mount command to check whether the volume was successfully
mounted.
# mount
server1:/test-volume on /mnt/glusterfs type nfs (rw,addr=server1)
Run the df command to display the aggregated storage space from all
the bricks in a volume.
# df -h /mnt/glusterfs
Filesystem              Size Used Avail Use% Mounted on
server1:/test-volume    28T  22T  5.4T  82%  /mnt/glusterfs
Move to the mount directory using the cd command, and list the
contents.
# cd /mnt/glusterfs
# ls
Troubleshooting NFS
Q: The mount command on the NFS client fails with
RPC Error: Program not registered. This error is encountered due to
one of the following reasons:
-
The NFS server is not running. You can check the status using the following command:
# gluster volume status
-
The volume is not started. You can check the status using the following command:
# gluster volume info
-
rpcbind is restarted. To check if rpcbind is running, execute the following command:
# ps ax| grep rpcbind -
If the NFS server is not running, then restart the NFS server using the following command:
# gluster volume start VOLNAME
-
If the volume is not started, then start the volume using the following command:
# gluster volume start VOLNAME
-
If both rpcbind and NFS server is running then restart the NFS server using the following commands:
# gluster volume stop VOLNAME# gluster volume start VOLNAME
Q: The rpcbind service is not running on the NFS client. This could be due to the following reasons:
-
The portmap is not running.
-
Another instance of kernel NFS server or glusterNFS server is running.
A: Start the rpcbind service by running the following command:
# service rpcbind start
Q: The NFS server glusterfsd starts but the initialization fails with nfsrpc- service: portmap registration of program failed error message in the log.
A: NFS start-up succeeds but the initialization of the NFS service can still fail preventing clients from accessing the mount points. Such a situation can be confirmed from the following error messages in the log file:
[2010-05-26 23:33:47] E [rpcsvc.c:2598:rpcsvc_program_register_portmap] rpc-service: Could notregister with portmap
[2010-05-26 23:33:47] E [rpcsvc.c:2682:rpcsvc_program_register] rpc-service: portmap registration of program failed
[2010-05-26 23:33:47] E [rpcsvc.c:2695:rpcsvc_program_register] rpc-service: Program registration failed: MOUNT3, Num: 100005, Ver: 3, Port: 38465
[2010-05-26 23:33:47] E [nfs.c:125:nfs_init_versions] nfs: Program init failed
[2010-05-26 23:33:47] C [nfs.c:531:notify] nfs: Failed to initialize protocols
[2010-05-26 23:33:49] E [rpcsvc.c:2614:rpcsvc_program_unregister_portmap] rpc-service: Could not unregister with portmap
[2010-05-26 23:33:49] E [rpcsvc.c:2731:rpcsvc_program_unregister] rpc-service: portmap unregistration of program failed
[2010-05-26 23:33:49] E [rpcsvc.c:2744:rpcsvc_program_unregister] rpc-service: Program unregistration failed: MOUNT3, Num: 100005, Ver: 3, Port: 38465
-
Start the rpcbind service on the NFS server by running the following command:
# service rpcbind start
After starting rpcbind service, glusterFS NFS server needs to be restarted.
-
Stop another NFS server running on the same machine.
Such an error is also seen when there is another NFS server running on the same machine but it is not the glusterFS NFS server. On Linux systems, this could be the kernel NFS server. Resolution involves stopping the other NFS server or not running the glusterFS NFS server on the machine. Before stopping the kernel NFS server, ensure that no critical service depends on access to that NFS server’s exports.
On Linux, kernel NFS servers can be stopped by using either of the following commands depending on the distribution in use:
# service nfs-kernel-server stop
# service nfs stop
-
Restart glusterFS NFS server.
Q: The NFS server start-up fails with the message Port is already in use in the log file.
A: This error can arise in case there is already a glusterFS NFS server running on the same machine. This situation can be confirmed from the log file, if the following error lines exist:
[2010-05-26 23:40:49] E [rpc-socket.c:126:rpcsvc_socket_listen] rpc-socket: binding socket failed:Address already in use
[2010-05-26 23:40:49] E [rpc-socket.c:129:rpcsvc_socket_listen] rpc-socket: Port is already in use
[2010-05-26 23:40:49] E [rpcsvc.c:2636:rpcsvc_stage_program_register] rpc-service: could not create listening connection
[2010-05-26 23:40:49] E [rpcsvc.c:2675:rpcsvc_program_register] rpc-service: stage registration of program failed
[2010-05-26 23:40:49] E [rpcsvc.c:2695:rpcsvc_program_register] rpc-service: Program registration failed: MOUNT3, Num: 100005, Ver: 3, Port: 38465
[2010-05-26 23:40:49] E [nfs.c:125:nfs_init_versions] nfs: Program init failed
[2010-05-26 23:40:49] C [nfs.c:531:notify] nfs: Failed to initialize protocols
In this release, the glusterFS NFS server does not support running multiple NFS servers on the same machine. To resolve the issue, one of the glusterFS NFS servers must be shutdown.
Q: The mount command fails with NFS server failed error:
mount: mount to NFS server '10.1.10.11' failed: timed out (retrying).
Review and apply the suggested solutions to correct the issue.
-
Disable name lookup requests from NFS server to a DNS server.
The NFS server attempts to authenticate NFS clients by performing a reverse DNS lookup to match host names in the volume file with the client IP addresses. There can be a situation where the NFS server either is not able to connect to the DNS server or the DNS server is taking too long to respond to DNS request. These delays can result in delayed replies from the NFS server to the NFS client resulting in the timeout error.
NFS server provides a work-around that disables DNS requests, instead relying only on the client IP addresses for authentication. The following option can be added for successful mounting in such situations:
option nfs.addr.namelookup off
Note
Remember that disabling the NFS server forces authentication of clients to use only IP addresses. If the authentication rules in the volume file use host names, those authentication rules will fail and client mounting will fail.
-
NFS version used by the NFS client is other than version 3 by default.
glusterFS NFS server supports version 3 of NFS protocol by default. In recent Linux kernels, the default NFS version has been changed from 3 to 4. It is possible that the client machine is unable to connect to the glusterFS NFS server because it is using version 4 messages which are not understood by glusterFS NFS server. The timeout can be resolved by forcing the NFS client to use version 3. The vers option to mount command is used for this purpose:
+
# mount nfsserver:export -o vers=3 /MOUNTPOINT
Q: The showmount command fails with clnt_create: RPC: Unable to receive error. This error is encountered due to the following reasons:
-
The firewall might have blocked the port.
-
rpcbind might not be running.
A: Check the firewall settings, and open ports 111 for portmap requests/replies and glusterFS NFS server requests/replies. glusterFS NFS server operates over the following port numbers: 38465, 38466, and 38467.
Q: The application fails with Invalid argument or Value too large for defined data type
A: These two errors generally happen for 32-bit NFS clients, or applications that do not support 64-bit inode numbers or large files.
Use the following option from the command-line interface to make glusterFS NFS return 32-bit inode numbers instead:
NFS.enable-ino32 <on | off>
This option is off by default, which permits NFS to return 64-bit
inode numbers by default.
Applications that will benefit from this option include those that are:
-
built and run on 32-bit machines, which do not support large files by default,
-
built to 32-bit standards on 64-bit systems.
Applications which can be rebuilt from source are recommended to be rebuilt using the following flag with gcc:
-D_FILE_OFFSET_BITS=64
Q: After the machine that is running NFS server is restarted the client fails to reclaim the locks held earlier.
A: The Network Status Monitor (NSM) service daemon (rpc.statd) is started before gluster NFS server. Hence, NSM sends a notification to the client to reclaim the locks. When the clients send the reclaim request, the NFS server does not respond as it is not started yet. Hence the client request fails.
Solution: To resolve the issue, prevent the NSM daemon from starting when the server starts.
Run chkconfig --list nfslock to check if NSM is configured during OS
boot.
If any of the entries are on,`run `chkconfig nfslock off to disable
NSM clients during boot, which resolves the issue.
Q: The rpc actor failed to complete successfully error is
displayed in the nfs.log, even after the volume is mounted successfully.
A: gluster NFS supports only NFS version 3. When nfs-utils mounts a
client when the version is not mentioned, it tries to negotiate using
version 4 before falling back to version 3. This is the cause of the
messages in both the server log and the nfs.log file.
[2013-06-25 00:03:38.160547] W [rpcsvc.c:180:rpcsvc_program_actor] 0-rpc-service: RPC program version not available (req 100003 4)
[2013-06-25 00:03:38.160669] E [rpcsvc.c:448:rpcsvc_check_and_reply_error] 0-rpcsvc: rpc actor failed to complete successfully
To resolve the issue, declare NFS version 3 and the noacl option in
the mount command as follows:
mount -t nfs -o vers=3,noacl server1:/test-volume /mnt/glusterfs
Q: The mount command fails with No such file or directory.
A: This problem is encountered as the volume is not present.
NFS-Ganesha
NFS-Ganesha is a user space file server for the NFS protocol with support for NFSv3, v4, v4.1, pNFS.
GlusterFS is supported with the community’s V2.3.1 stable release of NFS-Ganesha. The current release of GlusterFS introduces High Availability (HA) of NFS servers in active-active mode. pNFS is introduced as a tech preview feature. However, it does not support NFSv4 delegations and NFSv4.1.
Note
To install NFS-Ganesha refer, Deploying NFS-Ganesha on GlusterFS in the GlusterFS Installation Guide.
The following table contains the feature matrix of the NFS support on GlusterFS and later:
| Features | glusterFS NFS (NFSv3) | NFS-Ganesha (NFSv3) | NFS-Ganesha (NFSv4) |
|---|---|---|---|
Root-squash |
Yes |
Yes |
Yes |
Sub-directory exports |
Yes |
Yes |
Yes |
Locking |
Yes |
Yes |
Yes |
Client based export permissions |
Yes |
Yes |
Yes |
Netgroups |
Tech Preview |
Tech Preview |
Tech Preview |
Mount protocols |
UDP, TCP |
UDP, TCP |
Only TCP |
NFS transport protocols |
TCP |
UDP, TCP |
TCP |
AUTH_UNIX |
Yes |
Yes |
Yes |
AUTH_NONE |
Yes |
Yes |
Yes |
AUTH_KRB |
No |
Yes |
Yes |
ACLs |
Yes |
No |
Yes |
Delegations |
N/A |
N/A |
No |
High availability |
Yes (but no lock-recovery) |
Yes |
Yes |
High availability (fail-back) |
Yes (but no lock-recovery) |
Yes |
Yes |
Multi-head |
Yes |
Yes |
Yes |
Gluster RDMA volumes |
Yes |
Available but not supported |
Available but not supported |
DRC |
Available but not supported |
No |
No |
Dynamic exports |
No |
Yes |
Yes |
pseudofs |
N/A |
N/A |
Yes |
NFSv4.1 |
N/A |
N/A |
Not Supported |
NFSv4.1/pNFS |
N/A |
N/A |
Tech Preview |
Note
does not recommend running NFS-Ganesha in mixed-mode and/or hybrid environments. This includes multi-protocol environments where NFS and CIFS shares are used simultaneously, or running NFS-Ganesha together with gluster-nfs, kernel-nfs or gluster-fuse clients
Only one of NFS-Ganesha, gluster-NFS or kernel-NFS servers can be enabled on a given machine/host as all NFS implementations use the port 2049 and only one can be active at a given time. Hence you must disable kernel-NFS before NFS-Ganesha is started.
Port Information for NFS-Ganesha
You must ensure to enable the NFS firewall service along with the NFS-Ganesha firewall services. For more information NFS firewall services, see NFS.
-
On Red Hat Enterprise Linux 7, enable the NFS-Ganesha firewall service for nfs, rpcbind, mountd, nlm, rquota, and HA in the active zones or runtime and permanent mode using the following commands. In addition, configure firewalld to add port '662' which will be used by statd service.
-
Get a list of active zones using the following command:
# firewall-cmd --get-active-zones
-
Allow the firewall service in the active zones, run the following commands:
# firewall-cmd --zone=public  --add-service=nlm  --add-service=nfs  --add-service=rpc-bind  --add-service=high-availability --add-service=mountd --add-service=rquota

# firewall-cmd --zone=public  --add-service=nlm  --add-service=nfs  --add-service=rpc-bind  --add-service=high-availability --add-service=mountd --add-service=rquota --permanent

# firewall-cmd --zone=public --add-port=662/tcp --add-port=662/udp

# firewall-cmd --zone=public --add-port=662/tcp --add-port=662/udp --permanent
-
On the NFS-client machine, configure firewalld to add ports used by statd and nlm services by executing the following commands:
# firewall-cmd --zone=public --add-port=662/tcp --add-port=662/udp \
--add-port=32803/tcp --add-port=32769/udp

# firewall-cmd --zone=public --add-port=662/tcp --add-port=662/udp \
--add-port=32803/tcp --add-port=32769/udp --permanent
-
-
Ensure to configure the ports mentioned above. For more information see Defining Service Ports. in Section 7.2.4.3.1 Pre-requisites to run nfs-ganesha,
-
The following table lists the port details for NFS-Ganesha:
Note
The port details for the GlusterFS services are listed under section 4.1. Port Information.
Service |
Port Number |
Protocol |
sshd |
22 |
TCP |
rpcbind/portmapper |
111 |
TCP/UDP |
NFS |
2049 |
TCP/UDP |
mountd |
20048 |
TCP/UDP |
NLM |
32803 |
TCP/UDP |
Rquota |
875 |
TCP/UDP |
statd |
662 |
TCP/UDP |
pcsd |
2224 |
TCP |
pacemaker_remote |
3121 |
TCP |
corosync |
5404 and 5405 |
UDP |
dlm |
21064 |
TCP |
Supported Features of NFS-Ganesha
Highly Available Active-Active NFS-Ganesha.
In a highly available active-active environment, if a NFS-Ganesha server that is connected to a NFS client running a particular application goes down, the application/NFS client is seamlessly connected to another NFS-Ganesha server without any administrative intervention.
For more information about Highly Available Active-Active NFS-Ganesha, see section Highly Available Active-Active NFS-Ganesha.
pNFS (Tech-Preview).
The Parallel Network File System (pNFS) is part of the NFS v4.1 protocol that allows compute clients to access storage devices directly and in parallel.
For more information about pNFS, see section pNFS.
Dynamic Export of Volumes.
Previous versions of NFS-Ganesha required a restart of the server whenever the administrator had to add or remove exports. NFS-Ganesha now supports addition and removal of exports dynamically. Dynamic exports is managed by the DBus interface. DBus is a system local IPC mechanism for system management and peer-to-peer application communication.
Note
Modifying an export in place is currently not supported.
Exporting Multiple Entries.
With this version of NFS-Ganesha, multiple GlusterFS volumes or sub-directories can now be exported simultaneously.
Pseudo File System.
This version of NFS-Ganesha now creates and maintains a NFSv4 pseudo-file system, which provides clients with seamless access to all exported objects on the server.
Access Control List.
NFS-Ganesha NFSv4 protocol includes integrated support for Access Control List (ACL)s, which are similar to those used by Windows. These ACLs can be used to identify a trustee and specify the access rights allowed, or denied for that trustee.This feature is disabled by default.
Note
AUDIT and ALARM ACE types are not currently supported.
Highly Available Active-Active NFS-Ganesha
In a highly available active-active environment, if a NFS-Ganesha server that is connected to a NFS client running a particular application goes down, the application/NFS client is seamlessly connected to another NFS-Ganesha server without any administrative intervention.
The cluster is maintained using Pacemaker and Corosync. Pacemaker acts a resource manager and Corosync provides the communication layer of the cluster. For more information about Pacemaker/Corosync see Clustering.
Data coherency across the multi-head NFS-Ganesha servers in the cluster is achieved using the Gluster’s Upcall infrastructure. Gluster’s Upcall infrastructure is a generic and extensible framework that sends notifications to the respective glusterfs clients (in this case NFS-Ganesha server) when changes are detected in the back-end file system.
The Highly Available cluster is configured in the following three stages:
-
Creating the ganesha-ha.conf file.
The ganesha-ha.conf.example is created in the following location /etc/ganesha when GlusterFS is installed. Rename the file to ganesha-ha.conf and make the changes based on your environment.
Following is an example:
Sample ganesha-ha.conf file:

# Name of the HA cluster created.
# must be unique within the subnet
HA_NAME="ganesha-ha-360"
#
# The gluster server from which to mount the shared data volume.
HA_VOL_SERVER="server1"
#
# You may use short names or long names; you may not use IP addresses.
# Once you select one, stay with it as it will be mildly unpleasant to clean up if you switch later on. Ensure that all names - short and/or long - are in DNS or /etc/hosts on all machines in the cluster.
#
# The subset of nodes of the Gluster Trusted Pool that form the ganesha HA cluster. Hostname is specified.
#HA_CLUSTER_NODES="server1.lab.redhat.com,server2.lab.redhat.com,..."
#
# Virtual IPs for each of the nodes specified above.
#VIP_server1_lab_redhat_com="10.0.2.1"
#VIP_server2_lab_redhat_com="10.0.2.2"
....
....
Note
-
PCS handles the creation of the VIP and assigning a interface.
-
Ensure that the VIP is in the same network range.
-
-
Configuring NFS-Ganesha using gluster CLI.
The HA cluster can be set up or torn down using gluster CLI. In addition, it can export and unexport specific volumes. For more information, see section Configuring NFS-Ganesha using gluster CLI.
-
Modifying the HA cluster using the ganesha-ha.sh script.
After creating the cluster, any further modification can be done using the ganesha-ha.sh script. For more information, see Modifying the HA cluster using the ganesha-ha.sh script.
Configuring NFS-Ganesha using Gluster CLI
Prerequisites to run NFS-Ganesha
Ensure that the following prerequisites are taken into consideration before you run NFS-Ganesha in your environment:
-
A GlusterFS volume must be available for export and NFS-Ganesha rpms are installed.
-
Disable the gluster-nfs, kernel-nfs, and smbd services.
-
Edit the ganesha-ha.conf file based on your environment.
-
Create multiple virtual IPs (VIPs) on the network for each of the servers configured in the ganesha-ha.conf file and assign them to any unused NIC.
-
Ensure that all the nodes in the cluster are DNS resolvable. For example, you can populate the /etc/hosts with the details of all the nodes in the cluster.
-
Make sure the SELinux is in Enforcing mode.
-
On Red Hat Enterprise Linux 7, execute the following commands to disable and stop NetworkManager service and to enable the network service.
# systemctl disable NetworkManager
# systemctl stop NetworkManager
# systemctl enable network
-
Start network service on all machines using the following command:
For Red Hat Enterprise Linux 6:
# service network start
For Red Hat Enterprise Linux 7:
# systemctl start network
-
Create and mount a gluster shared volume by executing the following command:
# gluster volume set all cluster.enable-shared-storage enable
volume set: success
For more information, see Setting up Shared Storage Volume
-
Enable the pacemaker service using the following command:
For Red Hat Enterprise Linux 6:
# chkconfig --add pacemaker
# chkconfig pacemaker on
For Red Hat Enterprise Linux 7:
# systemctl enable pacemaker.service
-
Start the pcsd service using the following command.
For Red Hat Enterprise Linux 6:
# service pcsd start
For Red Hat Enterprise Linux 7:
# systemctl start pcsd
Note
-
To start pcsd by default after the system is rebooted, execute the following command:
For Red Hat Enterprise Linux 6:
# chkconfig --add pcsd
# chkconfig pcsd on
For Red Hat Enterprise Linux 7:
# systemctl enable pcsd
-
-
Set a password for the user ‘hacluster’ on all the nodes using the following command. Use the same password for all the nodes:
# echo <password> | passwd --stdin hacluster
-
Perform cluster authentication between the nodes, where, username is ‘hacluster’, and password is the one you used in the previous step. Ensure to execute the following command on every node:
# pcs cluster auth <hostname1> <hostname2> ...
Note
The hostname of all the nodes in the Ganesha-HA cluster must be included in the command when executing it on every node.
For example, in a four node cluster; nfs1, nfs2, nfs3, and nfs4, execute the following command on every node:
# pcs cluster auth nfs1 nfs2 nfs3 nfs4
Username: hacluster
Password:
nfs1: Authorized
nfs2: Authorized
nfs3: Authorized
nfs4: Authorized
-
Passwordless ssh for the root user has to be enabled on all the HA nodes. Follow these steps,
-
On one of the nodes (node1) in the cluster, run:
# ssh-keygen -f /var/lib/glusterd/nfs/secret.pem -t rsa -N ''
-
Deploy the generated public key from node1 to all the nodes (including node1) by executing the following command for every node:
# ssh-copy-id -i /var/lib/glusterd/nfs/secret.pem.pub root@<node-ip/hostname>
-
Copy the ssh keypair from node1 to all the nodes in the Ganesha-HA cluster by executing the following command for every node:
# scp -i /var/lib/glusterd/nfs/secret.pem /var/lib/glusterd/nfs/secret.* root@<node-ip/hostname>:/var/lib/glusterd/nfs/
-
-
As part of cluster setup, port 875 is used to bind to the Rquota service. If this port is already in use, assign a different port to this service by modifying following line in ‘/etc/ganesha/ganesha.conf’ file on all the nodes.
# Use a non-privileged port for RQuota
Rquota_Port = 875;
-
Defining Service Ports.
To define the service ports, execute the following steps on every node in the nfs-ganesha cluster: 1. Edit /etc/sysconfig/nfs file as mentioned below:
+
# sed -i '/STATD_PORT/s/^#//' /etc/sysconfig/nfs
-
Restart the statd service:
For Red Hat Enterprise Linux 6:
# service nfslock restart
For Red Hat Enterprise Linux 7:
# systemctl restart nfs-config
# systemctl restart rpc-statd
Execute the following steps on the client machine:
-
Edit '/etc/sysconfig/nfs' using following commands:
# sed -i '/STATD_PORT/s/^#//' /etc/sysconfig/nfs
# sed -i '/LOCKD_TCPPORT/s/^#//' /etc/sysconfig/nfs
# sed -i '/LOCKD_UDPPORT/s/^#//' /etc/sysconfig/nfs
# sed -i '/MOUNTD_PORT/s/^#//' /etc/sysconfig/nfs
-
Restart the services:
For Red Hat Enterprise Linux 6:
# service nfslock restart
# service nfs restart
For Red Hat Enterprise Linux 7:
# systemctl restart nfs-config
# systemctl restart rpc-statd
# systemctl restart nfs-mountd
# systemctl restart nfslock
-
Configuring the HA Cluster
To setup the HA cluster, enable NFS-Ganesha by executing the following command:
Note
Before enabling or disabling NFS-Ganesha, ensure that all the nodes that are part of the NFS-Ganesha cluster are up.
# gluster nfs-ganesha enable
For example,
# gluster nfs-ganesha enable
Enabling NFS-Ganesha requires Gluster-NFS to be disabled across the trusted pool. Do you still want to continue?
 (y/n) y
This will take a few minutes to complete. Please wait ..
nfs-ganesha : success
Note
After enabling NFS-Ganesha, if
rpcinfo -pshows the statd port different from 662, then, restart the statd service:For Red Hat Enterprise Linux 6:
# service nfslock restartFor Red Hat Enterprise Linux 7:
# systemctl restart rpc-statd
To tear down the HA cluster, execute the following command:
# gluster nfs-ganesha disable
For example,
# gluster nfs-ganesha disable
Disabling NFS-Ganesha will tear down entire ganesha cluster across the trusted pool. Do you still want to continue?
(y/n) y
This will take a few minutes to complete. Please wait ..
nfs-ganesha : success
To verify the status of the HA cluster, execute the following script:
# /usr/libexec/ganesha/ganesha-ha.sh --status
For example:
# /usr/libexec/ganesha/ganesha-ha.sh --status

Cluster name: G1437076740.12
Last updated: Tue Jul 21 03:00:23 2015
Last change: Fri Jul 17 06:38:29 2015
Stack: corosync
Current DC: server4 (3) - partition with quorum
Version: 1.1.12-a14efad
4 Nodes configured
16 Resources configured


Online: [ server1 server2 server3 server4 ]

Full list of resources:

 Clone Set: nfs-mon-clone [nfs-mon]
     Started: [ server1 server2 server3 server4 ]
 Clone Set: nfs-grace-clone [nfs-grace]
     Started: [ server1 server2 server3 server4 ]
 server1-cluster_ip-1      (ocf::heartbeat:IPaddr):        Started server1
 server1-trigger_ip-1      (ocf::heartbeat:Dummy): Started server1
 server2-cluster_ip-1      (ocf::heartbeat:IPaddr):        Started server2

   ...output abbreviated...
Note
It is recommended to manually restart the
ganesha.nfsdservice after the node is rebooted, to fail back the VIPs.
Exporting and Unexporting Volumes through NFS-Ganesha
Exporting Volumes through NFS-Ganesha.
To export a GlusterFS volume, execute the following command:
# gluster volume set <volname> ganesha.enable on
For example:
# gluster vol set testvol ganesha.enable on
volume set: success
Unexporting Volumes through NFS-Ganesha.
To unexport a GlusterFS volume, execute the following command:
# gluster volume set <volname> ganesha.enable off
This command unexports the GlusterFS volume without affecting other exports.
For example:
# gluster vol set testvol ganesha.enable off
volume set: success
Verifying the Status.
To verify the status of the volume set options, follow the guidelines mentioned below:
-
Check if NFS-Ganesha is started by executing the following commands:
On Red Hat Enterprise Linux-6,
# service nfs-ganesha status
For example:
# service nfs-ganesha status
ganesha.nfsd (pid  4136) is running...
On Red Hat Enterprise Linux-7
# systemctl status nfs-ganesha
For example:
# systemctl status nfs-ganesha nfs-ganesha.service - NFS-Ganesha file server Loaded: loaded (/usr/lib/systemd/system/nfs-ganesha.service; disabled) Active: active (running) since Tue 2015-07-21 05:08:22 IST; 19h ago Docs: http://github.com/nfs-ganesha/nfs-ganesha/wiki Main PID: 15440 (ganesha.nfsd) CGroup: /system.slice/nfs-ganesha.service └─15440 /usr/bin/ganesha.nfsd -L /var/log/ganesha.log -f /etc/ganesha/ganesha.conf -N NIV_EVENT Jul 21 05:08:22 server1 systemd[1]: Started NFS-Ganesha file server.] -
Check if the volume is exported.
# showmount -e localhost
For example:
# showmount -e localhost
Export list for localhost:
/volname (everyone)
-
The logs of ganesha.nfsd daemon are written to /var/log/ganesha.log. Check the log file on noticing any unexpected behavior.
Modifying the HA cluster using the ganesha-ha.sh script
To modify the existing HA cluster and to change the default values of the exports use the ganesha-ha.sh script located at /usr/libexec/ganesha/.
-
Adding a node to the cluster.
Before adding a node to the cluster, ensure all the prerequisites mentioned in section Pre-requisites to run NFS-Ganesha is met. To add a node to the cluster, execute the following command on any of the nodes in the existing NFS-Ganesha cluster:
# /usr/libexec/ganesha/ganesha-ha.sh --add <HA_CONF_DIR> <HOSTNAME> <NODE-VIP>
where,
HA_CONF_DIR: The directory path containing the ganesha-ha.conf file. By default it is
/etc/ganesha.HOSTNAME: Hostname of the new node to be added
NODE-VIP: Virtual IP of the new node to be added.
For example:
# /usr/libexec/ganesha/ganesha-ha.sh --add /etc/ganesha server16 10.00.00.01
-
Deleting a node in the cluster.
To delete a node from the cluster, execute the following command on any of the nodes in the existing NFS-Ganesha cluster:
# /usr/libexec/ganesha/ganesha-ha.sh --delete <HA_CONF_DIR> <HOSTNAME>
where,
HA_CONF_DIR: The directory path containing the ganesha-ha.conf file. By default it is located at
/etc/ganesha.HOSTNAME: Hostname of the new node to be added
For example:
# /usr/libexec/ganesha/ganesha-ha.sh --delete /etc/ganesha server16
-
Modifying the default export configuration.
To modify the default export configurations perform the following steps on any of the nodes in the existing ganesha cluster: 1. Edit/add the required fields in the corresponding export file located at /etc/ganesha/exports/. 2. Execute the following command:
+
# /usr/libexec/ganesha/ganesha-ha.sh --refresh-config <HA_CONF_DIR> <volname>
+ where,
+ HA_CONF_DIR: The directory path containing the ganesha-ha.conf file. By default it is located at
/etc/ganesha.+ volname: The name of the volume whose export configuration has to be changed.
+ For example:
+
# /usr/libexec/ganesha/ganesha-ha.sh --refresh-config /etc/ganesha testvol
+
Note
The export ID must not be changed.
Accessing NFS-Ganesha Exports
NFS-Ganesha exports can be accessed by mounting them in either NFSv3 or NFSv4 mode. Since this is an active-active HA configuration, the mount operation can be performed from the VIP of any node.
Note
Ensure that NFS clients and NFS-Ganesha servers in the cluster are DNS resolvable with unique host-names to use file locking through Network Lock Manager (NLM) protocol.
Mounting exports in NFSv3 mode.
To mount an export in NFSv3 mode, execute the following command:
# mount -t nfs -o vers=3 virtual_ip:/volname /mountpoint
For example:
mount -t nfs -o vers=3 10.70.0.0:/testvol /mnt
Mounting exports in NFSv4 mode.
To mount an export in NFSv4 mode, execute the following command:
# mount -t nfs -o vers=4 virtual_ip:/volname /mountpoint
For example:
mount -t nfs -o vers=4 10.70.0.0:/testvol /mnt
NFS-Ganesha Service Downtime
In a highly available active-active environment, if a NFS-Ganesha server that is connected to a NFS client running a particular application goes down, the application/NFS client is seamlessly connected to another NFS-Ganesha server without any administrative intervention. However, there is a delay or fail-over time in connecting to another NFS-Ganesha server. This delay can be experienced during fail-back too, that is, when the connection is reset to the original node/server.
The following list describes how the time taken for the NFS server to detect a server reboot or resume is calculated.
-
If the ganesha.nfsd dies (crashes, oomkill, admin kill), the maximum time to detect it and put the ganesha cluster into grace is 20sec, plus whatever time pacemaker needs to effect the fail-over.
Note
This time taken to detect if the service is down, can be edited using the following command on all the nodes:
# pcs resource op remove nfs-mon monitor
# pcs resource op add nfs-mon monitor interval=<interval_period_value>
-
If the whole node dies (including network failure) then this down time is the total of whatever time pacemaker needs to detect that the node is gone, the time to put the cluster into grace, and the time to effect the fail-over. This is ~20 seconds.
-
So the max-fail-over time is approximately 20-22 seconds, and the average time is typically less. In other words, the time taken for NFS clients to detect server reboot or resume I/O is 20 - 22 seconds.
Modifying the Fail-over Time
Since NFS servers will be in the grace period post failover, as defined by NFS RFC, clients will try to reclaim their lost OPEN/LOCK state. For more information refer to Server Failure and Recovery Servers will block the conflicting FOPs during that period. The list of such FOPs is as below:
Protocols |
FOPs |
NFSV3 |
|
NLM |
|
NFSV4 |
|
Note
LOCK, SHARE, and UNSHARE will be blocked only if it is requested with reclaim set to FALSE.
OPEN will be blocked if requested with claim type other than CLAIM_PREVIOUS or CLAIM_DELEGATE_PREV.
The default value for the grace period is 90 seconds. This value can be
changed by adding the following lines in the /etc/ganesha/ganesha.conf
file.
NFSv4 {
Grace_Period=<grace_period_value_in_sec>;
}
After editing the /etc/ganesha/ganesha.conf file, restart the
NFS-Ganesha service using the following command on all the nodes :
On Red Hat Enterprise Linux 6.
# service nfs-ganesha restart
On Red Hat Enterprise Linux 7.
# systemctl restart nfs-ganesha
Configuring Kerberized NFS-Ganesha
Execute the following steps on all the machines:
-
Install the krb5-workstation and the ntpdate packages on all the machines:
# yum install krb5-workstation
# yum install ntpdate
Note
-
The krb5-libs package will be updated as a dependent package.
-
-
Configure the ntpdate based on the valid time server according to the environment:
# echo <valid_time_server> >> /etc/ntp/step-tickers

# systemctl enable ntpdate

# systemctl start ntpdate
-
Ensure that all systems can resolve each other by FQDN in DNS.
-
Configure the
/etc/krb5.conffile and add relevant changes accordingly. For example:[logging] default = FILE:/var/log/krb5libs.log kdc = FILE:/var/log/krb5kdc.log admin_server = FILE:/var/log/kadmind.log [libdefaults] dns_lookup_realm = false ticket_lifetime = 24h renew_lifetime = 7d forwardable = true rdns = false default_realm = EXAMPLE.COM default_ccache_name = KEYRING:persistent:%{uid} [realms] EXAMPLE.COM = { kdc = kerberos.example.com admin_server = kerberos.example.com } [domain_realm] .example.com = EXAMPLE.COM example.com = EXAMPLE.COM -
On the NFS-server and client, update the /etc/idmapd.conf file by making the required change. For example:
Domain = example.com
Setting up the NFS-Ganesha Server:
Execute the following steps to set up the NFS-Ganesha server:
Note
Before setting up the NFS-Ganesha server, make sure to set up the KDC based on the requirements.
-
Install the following packages:
# yum install nfs-utils
# yum install rpcbind
-
Install the relevant gluster and NFS-Ganesha rpms. For more information see, GlusterFS 3.1.2 Installation Guide.
-
Create a Kerberos principle and add it to krb5.keytab on the NFS-Ganesha server
$ kadmin
$ kadmin: addprinc -randkey nfs/<host_name>@EXAMPLE.COM
$ kadmin: ktadd nfs/<host_name>@EXAMPLE.COM
For example:
# kadmin
Authenticating as principal root/admin@EXAMPLE.COM with password.
Password for root/admin@EXAMPLE.COM:

kadmin:  addprinc -randkey nfs/<host_name>@EXAMPLE.COM
WARNING: no policy specified for nfs/<host_name>@EXAMPLE.COM; defaulting to no policy
Principal "nfs/<host_name>@EXAMPLE.COM" created.


kadmin:  ktadd nfs/<host_name>@EXAMPLE.COM
Entry for principal nfs/<host_name>@EXAMPLE.COM with kvno2, encryption type aes256-cts-hmac-sha1-96 added to keytab FILE:/etc/krb5.keytab.
Entry for principal nfs/<host_name>@EXAMPLE.COM with kvno 2, encryption type aes128-cts-hmac-sha1-96 added to keytab FILE:/etc/krb5.keytab.
Entry for principal nfs/<host_name>@EXAMPLE.COM with kvno 2, encryption type des3-cbc-sha1 added to keytab FILE:/etc/krb5.keytab.
Entry for principal nfs/<host_name>@EXAMPLE.COM with kvno 2, encryption type arcfour-hmac added to keytab FILE:/etc/krb5.keytab.
Entry for principal nfs/<host_name>@EXAMPLE.COM with kvno 2, encryption type camellia256-cts-cmac added to keytab FILE:/etc/krb5.keytab.
Entry for principal nfs/<host_name>@EXAMPLE.COM with kvno 2, encryption type camellia128-cts-cmac added to keytab FILE:/etc/krb5.keytab.
Entry for principal nfs/<host_name>@EXAMPLE.COM with kvno 2, encryption type des-hmac-sha1 added to keytab FILE:/etc/krb5.keytab.
Entry for principal nfs/<host_name>@EXAMPLE.COM with kvno 2, encryption type des-cbc-md5 added to keytab FILE:/etc/krb5.keytab.
-
Update
/etc/ganesha/ganesha.conffile as mentioned below:NFS_KRB5 { PrincipalName = nfs ; KeytabPath = /etc/krb5.keytab ; Active_krb5 = true ; DomainName = example.com; } -
Based on the different kerberos security flavours (krb5, krb5i and krb5p) supported by nfs-ganesha, configure the 'SecType' parameter in the volume export file (/etc/ganesha/exports/export.vol.conf) with appropriate security flavour
-
Create an unprivileged user and ensure that the users that are created are resolvable to the UIDs through the central user database. For example:
useradd guest
Note
The username of this user has to be the same as the one on the NFS-client.
Setting up the NFS Client
Execute the following steps to set up the NFS client:
Note
For a detailed information on setting up NFS-clients for security on Red Hat Enterprise Linux, see Section 8.8.2 NFS Security, in the Red Hat Enterprise Linux 7 Storage Administration Guide.
-
Install the following packages:
# yum install nfs-utils
# yum install rpcbind
-
Create a kerberos principle and add it to krb5.keytab on the client side. For example:
# kadmin
# kadmin: addprinc -randkey host/<host_name>@EXAMPLE.COM
# kadmin: ktadd host/<host_name>@EXAMPLE.COM
# kadmin
Authenticating as principal root/admin@EXAMPLE.COM with password.
Password for root/admin@EXAMPLE.COM:

kadmin:  addprinc -randkey host/<host_name>@EXAMPLE.COM
WARNING: no policy specified for host/<host_name>@EXAMPLE.COM; defaulting to no policy
Principal "host/<host_name>@EXAMPLE.COM" created.

kadmin:  ktadd host/<host_name>@EXAMPLE.COM
Entry for principal host/<host_name>@EXAMPLE.COM with kvno 2, encryption type aes256-cts-hmac-sha1-96 added to keytab FILE:/etc/krb5.keytab.
Entry for principal host/<host_name>@EXAMPLE.COM with kvno 2, encryption type aes128-cts-hmac-sha1-96 added to keytab FILE:/etc/krb5.keytab.
Entry for principal host/<host_name>@EXAMPLE.COM with kvno 2, encryption type des3-cbc-sha1 added to keytab FILE:/etc/krb5.keytab.
Entry for principal host/<host_name>@EXAMPLE.COM with kvno 2, encryption type arcfour-hmac added to keytab FILE:/etc/krb5.keytab.
Entry for principal host/<host_name>@EXAMPLE.COM with kvno 2, encryption type camellia256-cts-cmac added to keytab FILE:/etc/krb5.keytab.
Entry for principal host/<host_name>@EXAMPLE.COM with kvno 2, encryption type camellia128-cts-cmac added to keytab FILE:/etc/krb5.keytab.
Entry for principal host/<host_name>@EXAMPLE.COM with kvno 2, encryption type des-hmac-sha1 added to keytab FILE:/etc/krb5.keytab.
Entry for principal host/<host_name>@EXAMPLE.COM with kvno 2, encryption type des-cbc-md5 added to keytab FILE:/etc/krb5.keytab.
-
Check the status of nfs-client.target service and start it, if not already started:
# systemctl status nfs-client.target
# systemctl start nfs-client.target
# systemctl enable nfs-client.target
-
Create an unprivileged user and ensure that the users that are created are resolvable to the UIDs through the central user database. For example:
# useradd guest
Note
The username of this user has to be the same as the one on the NFS-server.
-
Mount the volume specifying kerberos security type:
# mount -t nfs -o sec=krb5 <host_name>:/testvolume /mnt
As root, all access should be granted.
For example:
Creation of a directory on the mount point and all other operations as root should be successful.
# mkdir <directory name>
-
Login as a guest user:
# su - guest
Without a kerberos ticket, all access to /mnt should be denied. For example:
# su guest
# ls
ls: cannot open directory .: Permission denied
-
Get the kerberos ticket for the guest and access /mnt:
# kinit
Password for guest@EXAMPLE.COM:

# ls
<directory created>
Important
With this ticket, some access must be allowed to /mnt. If there are directories on the NFS-server where "guest" does not have access to, it should work correctly.
pNFS
The Parallel Network File System (pNFS) is part of the NFS v4.1 protocol that allows compute clients to access storage devices directly and in parallel. The pNFS cluster consists of Meta-Data-Server (MDS) and Data-Server (DS). The client sends all the read/write requests directly to DS and all the other operations are handled by the MDS.
Current architecture supports only single MDS and mulitple data servers. The server with which client mounts will act as MDS and all severs including MDS can act as DS
Prerequisites
-
Disable kernel-NFS, glusterFS-NFS servers on the system using the following commands:
# service nfs stop
# gluster volume set <volname> nfs.disable ON
-
Disable nfs-ganesha and tear down HA cluster via gluster CLI (only if nfs-ganesha HA cluster is already created) by executing the following command:
# gluster features.ganesha disable
-
Turn on feature.cache-invalidation for the volume, by executing the following command:
# gluster volume set <volname> features.cache-invalidation on
Configuring NFS-Ganesha for pNFS
Ensure you make the following configurations to NFS-Ganesha:
-
Configure the MDS by adding following block to the ganesha.conf file located at
/etc/ganesha:GLUSTER { PNFS_MDS = true; } -
For optimal working of pNFS, NFS-Ganesha servers should run on every node in the trusted pool using the following command:
On RHEL 6
# service nfs-ganesha start
On RHEL 7
# systemctl start nfs-ganesha
-
Verify if the volume is exported via NFS-Ganesha on all the nodes by executing the following command:
# showmount -e localhost
Mounting Volume using pNFS
Mount the volume using NFS-Ganesha MDS server in the trusted pool using the following command.
# mount -t nfs4 -o minorversion=1 <IP-or-hostname-of-MDS-server>:/<volname> /mount-point
Manually Configuring NFS-Ganesha Exports
It is recommended to use gluster CLI options to export or unexport volumes through NFS-Ganesha. However, this section provides some information on changing configurable parameters in NFS-Ganesha. Such parameter changes require NFS-Ganesha to be started manually.
To modify the default export configurations perform the following steps on any of the nodes in the existing ganesha cluster:
-
Edit/add the required fields in the corresponding export file located at /etc/ganesha/exports/.
-
Execute the following command
# /usr/libexec/ganesha/ganesha-ha.sh --refresh-config <HA_CONF_DIR> <volname>
where:
-
HA_CONF_DIR: The directory path containing the ganesha-ha.conf file. By default it is located at
/etc/ganesha. -
volname: The name of the volume whose export configuration has to be changed.
Sample export configuration file:
The following are the default set of parameters required to export any entry. The values given here are the default values used by the CLI options to start or stop NFS-Ganesha.
# cat export.conf

EXPORT{
    Export_Id = 1 ;   # Export ID unique to each export
    Path = "volume_path";  # Path of the volume to be exported. Eg: "/test_volume"

    FSAL {
        name = GLUSTER;
        hostname = "10.xx.xx.xx";  # IP of one of the nodes in the trusted pool
        volume = "volume_name";     # Volume name. Eg: "test_volume"
    }

    Access_type = RW;     # Access permissions
    Squash = No_root_squash; # To enable/disable root squashing
    Disable_ACL = TRUE;     # To enable/disable ACL
    Pseudo = "pseudo_path";     # NFSv4 pseudo path for this export. Eg: "/test_volume_pseudo"
    Protocols = "3”, “4" ;     # NFS protocols supported
    Transports = "UDP”, “TCP" ; # Transport protocols supported
    SecType = "sys";     # Security flavors supported
}
The following section describes various configurations possible via
NFS-Ganesha. Minor changes have to be made to the export.conf file to
see the expected behavior.
-
Exporting Subdirectories
-
Providing Permissions for Specific Clients
-
Enabling and Disabling NFSv4 ACLs
-
Providing Pseudo Path for NFSv4 Mount
-
Providing pNFS support
Exporting Subdirectories.
To export subdirectories within a volume, edit the following parameters
in the export.conf file.
Path = "path_to_subdirectory";  # Path of the volume to be exported. Eg: "/test_volume/test_subdir"

 FSAL {
  name = GLUSTER;
  hostname = "10.xx.xx.xx";  # IP of one of the nodes in the trusted pool
  volume = "volume_name";  # Volume name. Eg: "test_volume"
  volpath = "path_to_subdirectory_with_respect_to_volume"; #Subdirectory path from the root of the volume. Eg: "/test_subdir"
 }
Providing Permissions for Specific Clients.
The parameter values and permission values given in the EXPORT block
applies to any client that mounts the exported volume. To provide
specific permissions to specific clients , introduce a client block
inside the EXPORT block.
For example, to assign specific permissions for client 10.00.00.01, add
the following block in the EXPORT block.
client {
        clients = 10.00.00.01;  # IP of the client.
        allow_root_access = true;
        access_type = "RO"; # Read-only permissions
        Protocols = "3"; # Allow only NFSv3 protocol.
        anonymous_uid = 1440;
        anonymous_gid = 72;
  }
All the other clients inherit the permissions that are declared outside
the client block.
Enabling and Disabling NFSv4 ACLs.
To enable NFSv4 ACLs , edit the following parameter:
Disable_ACL = FALSE;
Providing Pseudo Path for NFSv4 Mount.
To set NFSv4 pseudo path , edit the below parameter:
Pseudo = "pseudo_path"; # NFSv4 pseudo path for this export. Eg: "/test_volume_pseudo"
This path has to be used while mounting the export entry in NFSv4 mode.
Troubleshooting
Mandatory checks.
Ensure you execute the following commands for all the issues/failures that is encountered:
-
Make sure all the prerequisites are met.
-
Execute the following commands to check the status of the services:
# service nfs-ganesha status
# service pcsd status
# service pacemaker status
# pcs status
-
Review the followings logs to understand the cause of failure.
/var/log/ganesha.log
/var/log/ganesha-gfapi.log
/var/log/messages
/var/log/pcsd.log
-
Situation.
NFS-Ganesha fails to start.
Solution.
Ensure you execute all the mandatory checks to understand the root cause before proceeding with the following steps. Follow the listed steps to fix the issue: 1. Ensure the kernel and gluster nfs services are inactive. 2. Ensure that the port 4501 is free to connect to the RQUOTA service.
+ For more information see, section Manually Configuring NFS-Ganesha Exports.
-
Situation.
NFS-Ganesha Cluster setup fails.
Solution.
Ensure you execute all the mandatory checks to understand the root cause before proceeding with the following steps. 1. Ensure the kernel and gluster nfs services are inactive. 2. Ensure that
pcs cluster authcommand is executed on all the nodes with same password for the userhacluster3. Ensure that shared volume storage is mounted on all the nodes. 4. Ensure that the name of the HA Cluster does not exceed 15 characters. 5. Ensure UDP multicast packets are pingable usingOMPING. 6. Ensure that Virtual IPs are not assigned to any NIC. 7. For further trouble shooting guidelines related to clustering, refer to https://access.redhat.com/documentation/en-US/Red_Hat_Enterprise_Linux/7/ -
Situation.
NFS-Ganesha has started and fails to export a volume.
Solution.
Ensure you execute all the mandatory checks to understand the root cause before proceeding with the following steps. Follow the listed steps to fix the issue: 1. Ensure that volume is in
Startedstate using the following command:+
# gluster volume status <volname>
-
Execute the following commands to check the status of the services:
# service nfs-ganesha status
# showmount -e localhost
-
Review the followings logs to understand the cause of failure.
/var/log/ganesha.log
/var/log/ganesha-gfapi.log
/var/log/messages
-
Ensure that dbus service is running using the following command
# service messagebus status
-
-
Situation.
Adding a new node to the HA cluster fails.
Solution.
Ensure you execute all the mandatory checks to understand the root cause before proceeding with the following steps. Follow the listed steps to fix the issue: 1. Ensure to run the following command from one of the nodes that is already part of the cluster:
+
# ganesha-ha.sh --add <HA_CONF_DIR> <NODE-HOSTNAME> <NODE-VIP>
-
Ensure that gluster_shared_storage volume is mounted on the node that needs to be added.
-
Make sure that all the nodes of the cluster is DNS resolvable from the node that needs to be added.
-
Execute the following command for each of the hosts in the HA cluster on the node that needs to be added:
# pcs cluster auth <hostname>
-
-
Situation.
Permission issues.
Solution.
By default, the
root squashoption is disabled when you start NFS-Ganesha using the CLI. In case, you encounter any permission issues, check the unix permissions of the exported entry.
SMB
The Server Message Block (SMB) protocol can be used to access GlusterFS volumes by exporting directories in GlusterFS volumes as SMB shares on the server.
This section describes how to enable SMB shares, how to mount SMB shares on Microsoft Windows-based clients (both manually and automatically) and how to verify if the share has been mounted successfully.
Note
SMB access using the Mac OS X Finder is not supported.
The Mac OS X command line can be used to access GlusterFS volumes using SMB.
In GlusterFS, Samba is used to share volumes through SMB protocol.
Important
On Red Hat Enterprise Linux 7, enable the Samba firewall service in the active zones for runtime and permanent mode using the following commands:
To get a list of active zones, run the following command:
# firewall-cmd --get-active-zonesTo allow the firewall services in the active zones, run the following commands
# firewall-cmd --zone=zone_name --add-service=samba
# firewall-cmd --zone=zone_name --add-service=samba  --permanent
Setting up CTDB for Samba
In a replicated volume environment, the CTDB software (Cluster Trivial Database) has to be configured to provide high availability and lock synchronization for Samba shares. CTDB provides high availability by adding virtual IP addresses (VIPs) and a heartbeat service.
When a node in the trusted storage pool fails, CTDB enables a different node to take over the virtual IP addresses that the failed node was hosting. This ensures the IP addresses for the services provided are always available.
Important
On Red Hat Enterprise Linux 7, enable the CTDB firewall service in the active zones for runtime and permanent mode using the below commands:
To get a list of active zones, run the following command:
# firewall-cmd --get-active-zonesTo add ports to the active zones, run the following commands:
# firewall-cmd --zone=zone_name --add-port=4379/tcp
# firewall-cmd --zone=zone_name --add-port=4379/tcp  --permanent
Note
Amazon Elastic Compute Cloud (EC2) does not support VIPs and is hence not compatible with this solution.
Prerequisites.
Follow these steps before configuring CTDB on a GlusterFS Server:
-
If you already have an older version of CTDB (version ⇐ ctdb1.x), then remove CTDB by executing the following command:
# yum remove ctdb
After removing the older version, proceed with installing the latest CTDB.
Note
Ensure that the system is subscribed to the samba channel to get the latest CTDB packages.
-
Install CTDB on all the nodes that are used as Samba servers to the latest version using the following command:
# yum install ctdb
-
In a CTDB based high availability environment of Samba , the locks will not be migrated on failover.
-
You must ensure to open TCP port 4379 between the GlusterFS Storage servers: This is the internode communication port of CTDB.
Configuring CTDB on GlusterFS Server.
To configure CTDB on GlusterFS server, execute the following steps
-
Create a replicate volume. This volume will host only a zero byte lock file, hence choose minimal sized bricks. To create a replicate volume run the following command:
# gluster volume create volname replica n ipaddress:/brick path.......N times
where,
N: The number of nodes that are used as Samba servers. Each node must host one brick.
For example:
# gluster volume create ctdb replica 4 10.16.157.75:/rhgs/brick1/ctdb/b1 10.16.157.78:/rhgs/brick1/ctdb/b2 10.16.157.81:/rhgs/brick1/ctdb/b3 10.16.157.84:/rhgs/brick1/ctdb/b4
-
In the following files, replace "all" in the statement META="all" to the newly created volume name
/var/lib/glusterd/hooks/1/start/post/S29CTDBsetup.sh
/var/lib/glusterd/hooks/1/stop/pre/S29CTDB-teardown.sh
For example:
META="all"
  to
META="ctdb"
-
In the /etc/samba/smb.conf file add the following line in the global section on all the nodes:
clustering=yes
-
Start the volume.
The S29CTDBsetup.sh script runs on all GlusterFS servers, adds an entry in
/etc/fstab/for the mount, and mounts the volume at/gluster/lockon all the nodes with Samba server. It also enables automatic start of CTDB service on reboot.Note
When you stop the special CTDB volume, the S29CTDB-teardown.sh script runs on all GlusterFS servers and removes an entry in
/etc/fstab/for the mount and unmounts the volume at/gluster/lock. -
Verify if the file
/etc/sysconfig/ctdbexists on all the nodes that is used as Samba server. This file contains GlusterFS recommended CTDB configurations. -
Create
/etc/ctdb/nodesfile on all the nodes that is used as Samba servers and add the IPs of these nodes to the file.10.16.157.0 10.16.157.3 10.16.157.6 10.16.157.9
The IPs listed here are the private IPs of Samba servers.
-
On all the nodes that are used as Samba server which require IP failover, create /etc/ctdb/public_addresses file and add the virtual IPs that CTDB should create to this file. Add these IP address in the following format:
<Virtual IP>/<routing prefix><node interface>
For example:
192.168.1.20/24 eth0
192.168.1.21/24 eth0
-
Start the CTDB service on all the nodes by executing the following command:
# service ctdb start
Sharing Volumes over SMB
-
Run
gluster volume set VOLNAME stat-prefetch offto disable stat-prefetch for the volume. -
Run
gluster volume set VOLNAME server.allow-insecure onto permit insecure ports.Note
This allows Samba to communicate with brick processes even with untrusted ports.
-
Edit the
/etc/glusterfs/glusterd.volin each GlusterFS Storage node, and add the following setting:option rpc-auth-allow-insecure on
Note
This allows Samba to communicate with glusterd even with untrusted ports.
-
Restart
glusterdservice on each GlusterFS node. -
Run the following command to verify proper lock and I/O coherency.
# gluster volume set VOLNAME storage.batch-fsync-delay-usec 0
-
To verify if the volume can be accessed from the SMB/CIFS share, run the following command:
# smbclient -L <hostname> -U%
For example:
# smbclient -L rhs-vm1 -U% Domain=[MYGROUP] OS=[Unix] Server=[Samba 4.1.17] Sharename Type Comment --------- ---- ------- IPC$ IPC IPC Service (Samba Server Version 4.1.17) gluster-vol1 Disk For samba share of volume vol1 Domain=[MYGROUP] OS=[Unix] Server=[Samba 4.1.17] Server Comment --------- ------- Workgroup Master --------- ------- -
To verify if the SMB/CIFS share can be accessed by the user, run the following command:
# smbclient //<hostname>/gluster-<volname> -U <username>%<password>
For example:
# smbclient //10.0.0.1/gluster-vol1 -U root%redhat
Domain=[MYGROUP] OS=[Unix] Server=[Samba 4.1.17]
smb: \> mkdir test
smb: \> cd test\
smb: \test\> pwd
Current directory is \\10.0.0.1\gluster-vol1\test\
smb: \test\>
When a volume is started using the gluster volume start VOLNAME
command, the volume is automatically exported through Samba on all
GlusterFS servers running Samba.
To be able to mount from any server in the trusted storage pool, repeat these steps on each GlusterFS node. For more advanced configurations, refer to the Samba documentation.
-
Open the
/etc/samba/smb.conffile in a text editor and add the following lines for a simple configuration:[gluster-VOLNAME] comment = For samba share of volume VOLNAME vfs objects = glusterfs glusterfs:volume = VOLNAME glusterfs:logfile = /var/log/samba/VOLNAME.log glusterfs:loglevel = 7 path = / read only = no guest ok = yes
The configuration options are described in the following table:
Table 5. Configuration Options Configuration Options Required? Default Value Description Path
Yes
n/a
It represents the path that is relative to the root of the gluster volume that is being shared. Hence
/represents the root of the gluster volume. Exporting a subdirectory of a volume is supported and /subdir in path exports only that subdirectory of the volume.`glusterfs:volume `
Yes
n/a
The volume name that is shared.
glusterfs:logfileNo
NULL
Path to the log file that will be used by the gluster modules that are loaded by the vfs plugin. Standard Samba variable substitutions as mentioned in
smb.confare supported.glusterfs:loglevelNo
7
This option is equivalent to the
client-log-leveloption of gluster. 7 is the default value and corresponds to the INFO level.glusterfs:volfile_serverNo
localhost
The gluster server to be contacted to fetch the volfile for the volume.
-
Run
service smb [re]startto start or restart thesmbservice. -
Run
smbpasswdto set the SMB password.# smbpasswd -a username
Specify the SMB password. This password is used during the SMB mount.
Mounting Volumes using SMB
Samba follows the permissions on the shared directory, and uses the logged in username to perform access control.
To allow a non root user to read/write into the mounted volume, ensure you execute the following steps:
-
Add the user on all the Samba servers based on your configuration:
# adduser username -
Add the user to the list of Samba users on all Samba servers and assign password by executing the following command:
# smbpasswd -a username -
Perform a FUSE mount of the gluster volume on any one of the Samba servers:
# mount -t glusterfs -o acl ip-address:/volname /mountpointFor example:
# mount -t glusterfs -o acl rhs-a:/repvol /mnt
-
Provide required permissions to the user by executing appropriate
setfaclcommand. For example:# setfacl -m user:username:rwx mountpointFor example:
# setfacl -m user:cifsuser:rwx /mnt
Manually Mounting Volumes Using SMB on Red Hat Enterprise Linux and
Windows
-
Mounting a Volume Manually using SMB on Red Hat Enterprise Linux
-
Mounting a Volume Manually using SMB through Microsoft Windows Explorer
-
Mounting a Volume Manually using SMB on Microsoft Windows Command-line.
-
Install the
cifs-utilspackage on the client.# yum install cifs-utils
-
Run
mount -t cifsto mount the exported SMB share, using the syntax example as guidance.# mount -t cifs -o user=<username>,pass=<password> //<hostname>/gluster-<volname> /<mountpoint>
For example:
# mount -t cifs -o user=cifsuser,pass=redhat //rhs-a/gluster-repvol /cifs
-
Run
# smbstatus -Son the server to display the status of the volume:Service pid machine Connected at ------------------------------------------------------------------- gluster-VOLNAME 11967 __ffff_192.168.1.60 Mon Aug 6 02:23:25 2012
-
In Windows Explorer, click Tools > Map Network Drive…. to open the Map Network Drive screen.
-
Choose the drive letter using the Drive drop-down list.
-
In the Folder text box, specify the path of the server and the shared resource in the following format: \\SERVER_NAME\VOLNAME.
-
Click Finish to complete the process, and display the network drive in Windows Explorer.
-
Navigate to the network drive to verify it has mounted correctly.
-
Click Start > Run, and then type
cmd. -
Enter
net use z: \\SERVER_NAME\VOLNAME, where z: is the drive letter to assign to the shared volume.For example,
net use y: \\server1\test-volume -
Navigate to the network drive to verify it has mounted correctly.
-
Automatically Mounting Volumes Using SMB on Red Hat Enterprise Linux
and Windows
You can configure your system to automatically mount GlusterFS volumes using SMB on Microsoft Windows-based clients each time the system starts.
-
Mounting a Volume Automatically using SMB on Red Hat Enterprise Linux
-
Mounting a Volume Automatically on Server Start using SMB through Microsoft Windows Explorer
-
Open the
/etc/fstabfile in a text editor. -
Append the following configuration to the
fstabfile.You must specify the filename and its path that contains the user name and/or password in the
credentialsoption in/etc/fstabfile. See themount.cifsman page for more information.\\HOSTNAME|IPADDRESS\SHARE_NAME MOUNTDIR
Using the example server names, the entry contains the following replaced values.
\\server1\test-volume /mnt/glusterfs cifs credentials=/etc/samba/passwd,_netdev 0 0
-
Run
# smbstatus -Son the client to display the status of the volume:Service pid machine Connected at ------------------------------------------------------------------- gluster-VOLNAME 11967 __ffff_192.168.1.60 Mon Aug 6 02:23:25 2012
-
In Windows Explorer, click Tools > Map Network Drive…. to open the Map Network Drive screen.
-
Choose the drive letter using the Drive drop-down list.
-
In the Folder text box, specify the path of the server and the shared resource in the following format: \\SERVER_NAME\VOLNAME.
-
Click the Reconnect at logon check box.
-
Click Finish to complete the process, and display the network drive in Windows Explorer.
-
If the Windows Security screen pops up, enter the username and password and click OK.
-
Navigate to the network drive to verify it has mounted correctly.
-
Starting and Verifying your Configuration
Perform the following to start and verify your configuration:
-
Verify that CTDB is running using the following commands:
# ctdb status
# ctdb ip
# ctdb ping -n all
-
Mount a GlusterFS volume using any one of the VIPs.
-
Run
# ctdb ipto locate the physical server serving the VIP. -
Shut down the CTDB VIP server to verify successful configuration.
When the GlusterFS server serving the VIP is shut down there will be a pause for a few seconds, then I/O will resume.
Disabling SMB Shares
To stop automatic sharing on all nodes for all volumes execute the following steps:.
-
On all GlusterFS Servers, with elevated privileges, navigate to /var/lib/glusterd/hooks/1/start/post
-
Rename the S30samba-start.sh to K30samba-start.sh.
For more information about these scripts, see Section 16.2, “Prepackaged Scripts”.
To stop automatic sharing on all nodes for one particular volume:.
-
Run the following command to disable automatic SMB sharing per-volume:
# gluster volume set <VOLNAME> user.smb disable
Accessing Snapshots in Windows
A snapshot is a read-only point-in-time copy of the volume. Windows has an inbuilt mechanism to browse snapshots via Volume Shadow-copy Service (also known as VSS). Using this feature users can access the previous versions of any file or folder with minimal steps.
Note
Shadow Copy (also known as Volume Shadow-copy Service, or VSS) is a technology included in Microsoft Windows that allows taking snapshots of computer files or volumes, apart from viewing snapshots. Currently we only support viewing of snapshots. Creation of snapshots with this interface is NOT supported.
Configuring Shadow Copy
To configure shadow copy, the following configurations must be modified/edited in the smb.conf file. The smb.conf file is located at etc/samba/smb.conf.
Note
Ensure, shadow_copy2 module is enabled in smb.conf. To enable add the following parameter to the vfs objects option.
For example:
vfs objects = shadow_copy2 glusterfs
| Configuration Options | Required? | Default Value | Description |
|---|---|---|---|
shadow:snapdir |
Yes |
n/a |
Path to the directory where snapshots are kept. The snapdir name should be .snaps. |
shadow:basedir |
Yes |
n/a |
Path to the base directory that snapshots are from. The basedir value should be /. |
shadow:sort |
Optional |
unsorted |
The supported values are asc/desc. By this parameter one can specify that the shadow copy directories should be sorted before they are sent to the client. This can be beneficial as unix filesystems are usually not listed alphabetically sorted. If enabled, it is specified in descending order. |
shadow:localtime |
Optional |
UTC |
This is an optional parameter that indicates whether the snapshot names are in UTC/GMT or in local time. |
shadow:format |
Yes |
n/a |
This parameter specifies the format specification for the naming of snapshots. The format must be compatible with the conversion specifications recognized by str[fp]time. The default value is _GMT-%Y.%m.%d-%H.%M.%S. |
shadow:fixinodes |
Optional |
No |
If you enable shadow:fixinodes then this module will modify the apparent inode number of files in the snapshot directories using a hash of the files path. This is needed for snapshot systems where the snapshots have the same device:inode number as the original files (such as happens with GPFS snapshots). If you don’t set this option then the 'restore' button in the shadow copy UI will fail with a sharing violation. |
shadow:snapprefix |
Optional |
n/a |
Regular expression to match prefix of snapshot name. GlusterFS only supports Basic Regular Expression (BRE) |
shadow:delimiter |
Optional |
_GMT |
delimiter is used to separate shadow:snapprefix and shadow:format. |
Following is an example of the smb.conf file:
[gluster-vol0]
comment = For samba share of volume vol0
vfs objects = shadow_copy2 glusterfs
glusterfs:volume = vol0
glusterfs:logfile = /var/log/samba/glusterfs-vol0.%M.log
glusterfs:loglevel = 3
path = /
read only = no
guest ok = yes
shadow:snapdir = /.snaps
shadow:basedir = /
shadow:sort = desc
shadow:snapprefix= ^S[A-Za-z0-9]*p$
shadow:format = _GMT-%Y.%m.%d-%H.%M.%S
In the above example, the mentioned parameters have to be added in the smb.conf file to enable shadow copy. The options mentioned are not mandatory.
Shadow copy will filter all the snapshots based on the smb.conf entries. It will only show those snapshots which matches the criteria. In the example mentioned earlier, the snapshot name should start with an 'S' and end with 'p' and any alpha numeric characters in between is considered for the search. For example in the list of the following snapshots, the first two snapshots will be shown by Windows and the last one will be ignored. Hence, these options will help us filter out what snapshots to show and what not to.
Snap_GMT-2016.06.06-06.06.06
Sl123p_GMT-2016.07.07-07.07.07
xyz_GMT-2016.08.08-08.08.08
After editing the smb.conf file, execute the following steps to enable snapshot access:
-
Run
service smb [re]startto start or restart thesmbservice. -
Enable User Serviceable Snapshot (USS) for Samba. For more information see User Serviceable Snapshot
Accessing Snapshot
To access snapshot on the Windows system, execute the following steps:
-
Right Click on the file or directory for which the previous version is required.
-
Click on Restore previous versions.
-
In the dialog box, select the Date/Time of the previous version of the file, and select either Open, Restore, or Copy.
where,
Open: Lets you open the required version of the file in read-only mode.
Restore: Restores the file back to the selected version.
Copy: Lets you copy the file to a different location.
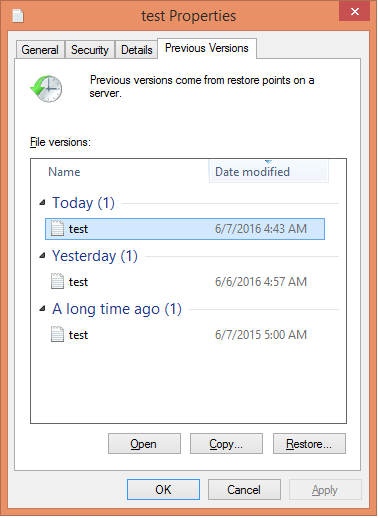
POSIX Access Control Lists
POSIX Access Control Lists (ACLs) allow different permissions for different users or groups to be assigned to files or directories, independent of the original owner or the owning group.
For example, the user John creates a file. He does not allow anyone in
the group to access the file, except for another user, Antony (even if
there are other users who belong to the group john).
This means, in addition to the file owner, the file group, and others, additional users and groups can be granted or denied access by using POSIX ACLs.
Setting POSIX ACLs
Two types of POSIX ACLs are available: access ACLs, and default ACLs.
Use access ACLs to grant permission to a specific file or directory.
Use default ACLs to set permissions at the directory level for all files in the directory. If a file inside that directory does not have an ACL, it inherits the permissions of the default ACLs of the directory.
ACLs can be configured for each file:
-
Per user
-
Per group
-
Through the effective rights mask
-
For users not in the user group for the file
Setting Access ACLs
Access ACLs grant permission for both files and directories.
The # setfacl –m entry_typefile_name command sets and modifies access
ACLs
- u:user_name:permissons
-
Sets the access ACLs for a user. Specify the user name, or the UID.
- g:group_name:permissions
-
Sets the access ACLs for a group. Specify the group name, or the GID.
- m:permission
-
Sets the effective rights mask. The mask is the combination of all access permissions of the owning group, and all user and group entries.
- o:permissions
-
Sets the access ACLs for users other than the ones in the group for the file.
If a file or directory already has a POSIX ACL, and the setfacl
command is used, the additional permissions are added to the existing
POSIX ACLs or the existing rule is modified.
For example, to give read and write permissions to user antony:
# setfacl -m u:antony:rw /mnt/gluster/data/testfile
Setting Default ACLs
New files and directories inherit ACL information from their parent directory, if that parent has an ACL that contains default entries. Default ACL entries can only be set on directories.
The # setfacl -d --set entry_type directory command sets default ACLs
for files and directories.
- u:user_name:permissons
-
Sets the access ACLs for a user. Specify the user name, or the UID.
- g:group_name:permissions
-
Sets the access ACLs for a group. Specify the group name, or the GID.
- m:permission
-
Sets the effective rights mask. The mask is the combination of all access permissions of the owning group, and all user and group entries.
- o:permissions
-
Sets the access ACLs for users other than the ones in the group for the file.
For example, run # setfacl -d --set o::r /mnt/gluster/data to set the
default ACLs for the` /data` directory to read-only for users not in the
user group,
Note
An access ACL set for an individual file can override the default ACL permissions.
Effects of a Default ACL
The following are the ways in which the permissions of a directory’s default ACLs are passed to the files and subdirectories in it:
-
A subdirectory inherits the default ACLs of the parent directory both as its default ACLs and as an access ACLs.
-
A file inherits the default ACLs as its access ACLs.
Retrieving POSIX ACLs
Run the # getfacl command to view the existing POSIX ACLs for a file
or directory.
# getfacl path/filename-
View the existing access ACLs of the
sample.jpgfile using the following command. +
# getfacl /mnt/gluster/data/test/sample.jpg
# owner: antony
# group: antony
user::rw-
group::rw-
other::r--
# getfacl directory name-
View the default ACLs of the
/docdirectory using the following command. +
# getfacl /mnt/gluster/data/doc
# owner: antony
# group: antony
user::rw-
user:john:r--
group::r--
mask::r--
other::r--
default:user::rwx
default:user:antony:rwx
default:group::r-x
default:mask::rwx
default:other::r-x
Removing POSIX ACLs
Run # setfacl -x ACL entry_type file to remove all permissions for a
user, groups, or others.
- u:user_name
-
Sets the access ACLs for a user. Specify the user name, or the UID.
- g:group_name
-
Sets the access ACLs for a group. Specify the group name, or the GID.
- m:permission
-
Sets the effective rights mask. The mask is the combination of all access permissions of the owning group, and all user and group entries.
- o:permissions
-
Sets the access ACLs for users other than the ones in the group for the file.
For example, to remove all permissions from the user antony:
# setfacl -x u:antony /mnt/gluster/data/test-file
Samba and ACLs
POSIX ACLs are enabled by default when using Samba to access a
GlusterFS volume. Samba is compiled with the --with-acl-support
option, so no special flags are required when accessing or mounting a
Samba share.